This guide will assume you haven’t used Recombee before. Even if you have, it’ll likely be necessary to go through this guide to see how the Recombee Chatbot extension utilizes Recombee and what needs to be done to allow it to function.
Signing up for Recombee
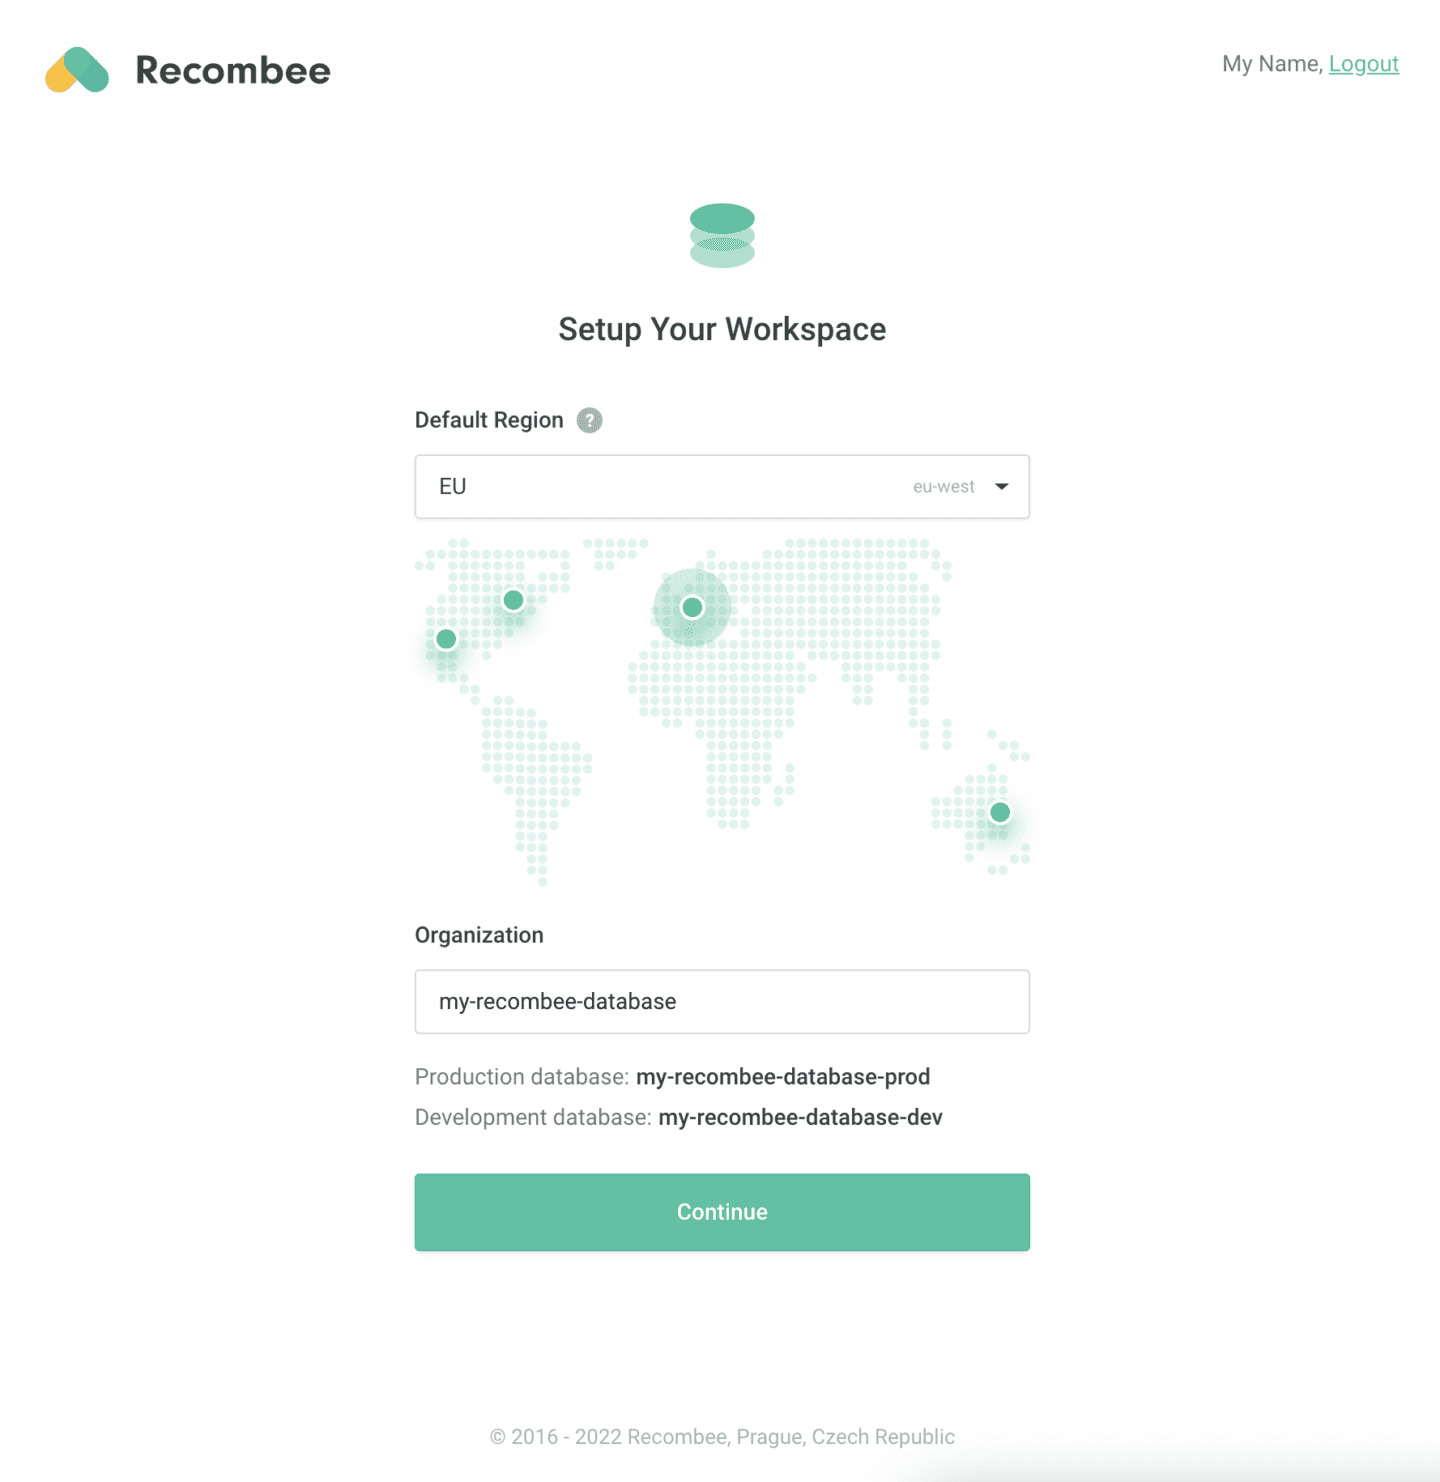
If you’ve already used Recombee, you can skip to the next section, but if you haven’t, you can sign up to Recombee on their site. As part of the sign up process, you will create your first pair of databases, one for development, the other for production usage.
Setting up your Recombee Database
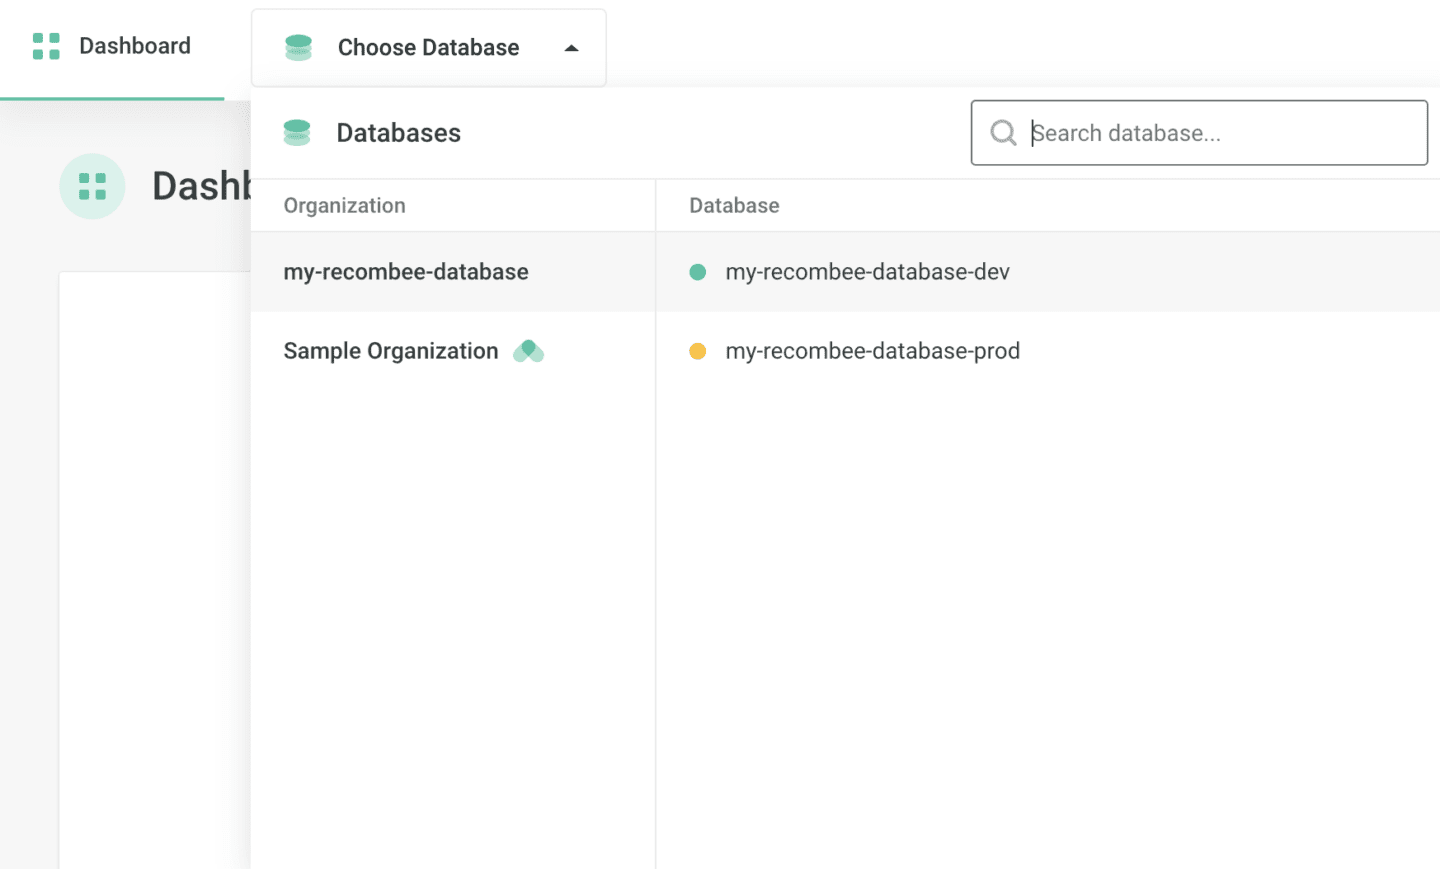
After signing up, you then choose which database you intend to work on. While still working on how the chatbot will be set up it’s best to use the -dev database, so the data being generated by your app users isn’t modified by you testing out Recombee.
Setting up Recombee users
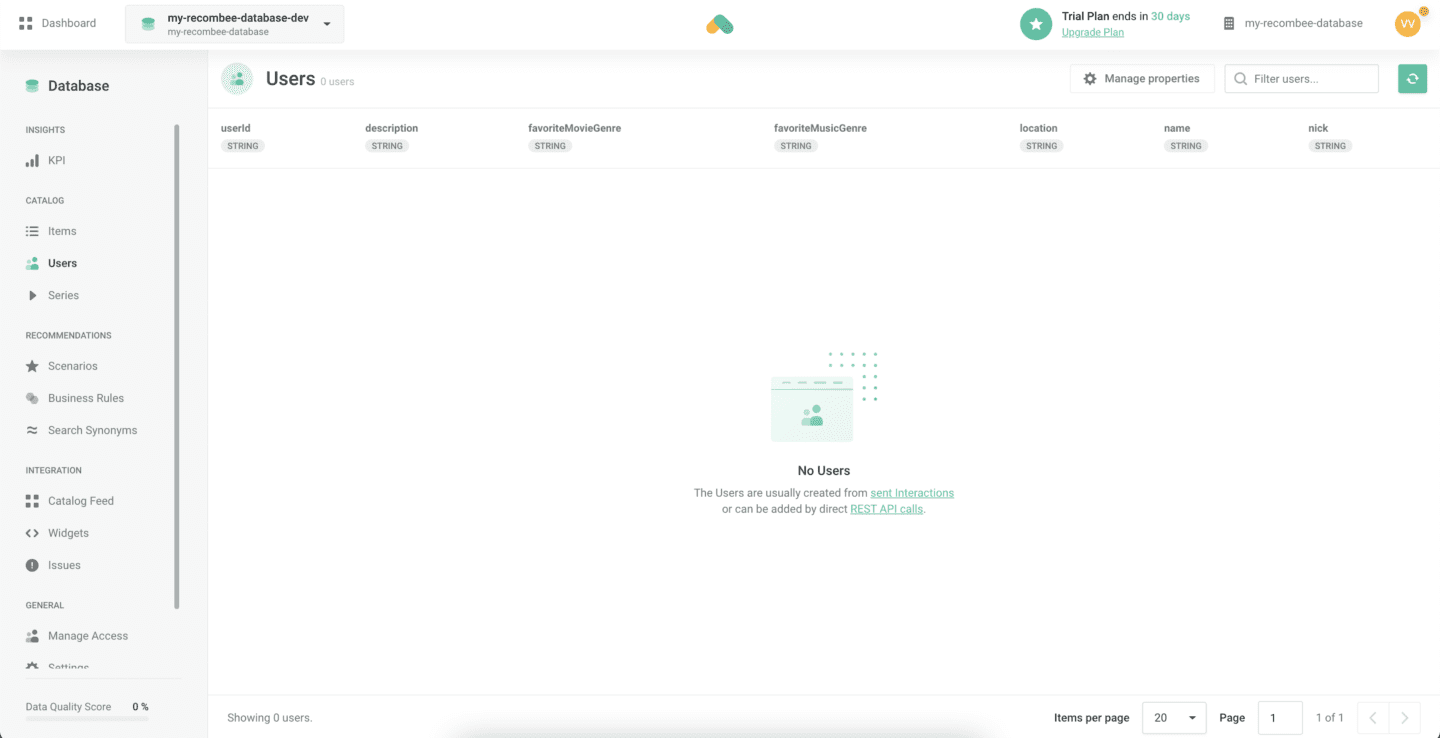
When an app user answers all the chatbot questions, their answers from the chatbot and the information from their user profiles in the app will be set as Recombee user properties. In order for the Recombee Chatbot extension to set any Recombee user properties, we’ll have to make sure that all of these Recombee user properties exist.
Question user properties
Questions themselves will be explained more in the Adding questions section. For now, it’s enough to know that each question the chatbot asks determines one of the user’s properties on Recombee. For example, if you have 2 questions and they determine favoriteMusicGenre and favoriteMovieGenre properties, you will have to make sure that your Recombee users have those two properties added. All user properties generated by the Recombee Chatbot extension are string format properties.

User Profile extension user properties
The User Profile extension allows app owners to determine which information app users can fill out about themselves in their profiles. The Recombee Chatbot extension takes all string format User Profile information and sets them as Recombee user properties. For example, the default settings of the User Profile extension results in a profile that includes the following properties:
- name
- Name and surname, string format
- image
- profile picture, image format
- nick
- username, string format, not editable by the app user, determined on sign up
- location
- location typed out by user, string format
- description
- “Bio” written by user, string format
- url
- array of website URLs, array format
Out of these properties, name, nick, location and description will need to be added as Recombee user properties because they’re string format properties, so let’s do that.
With these properties added to Recombee users, we can now add some Recombee items which Recombee will then recommend to app users.
Setting up Recombee items
The items Recombee recommends to users are added by using the Catalog Feed. There are multiple ways to create one, but in this guide we’ll use a comma separated value (CSV) file.
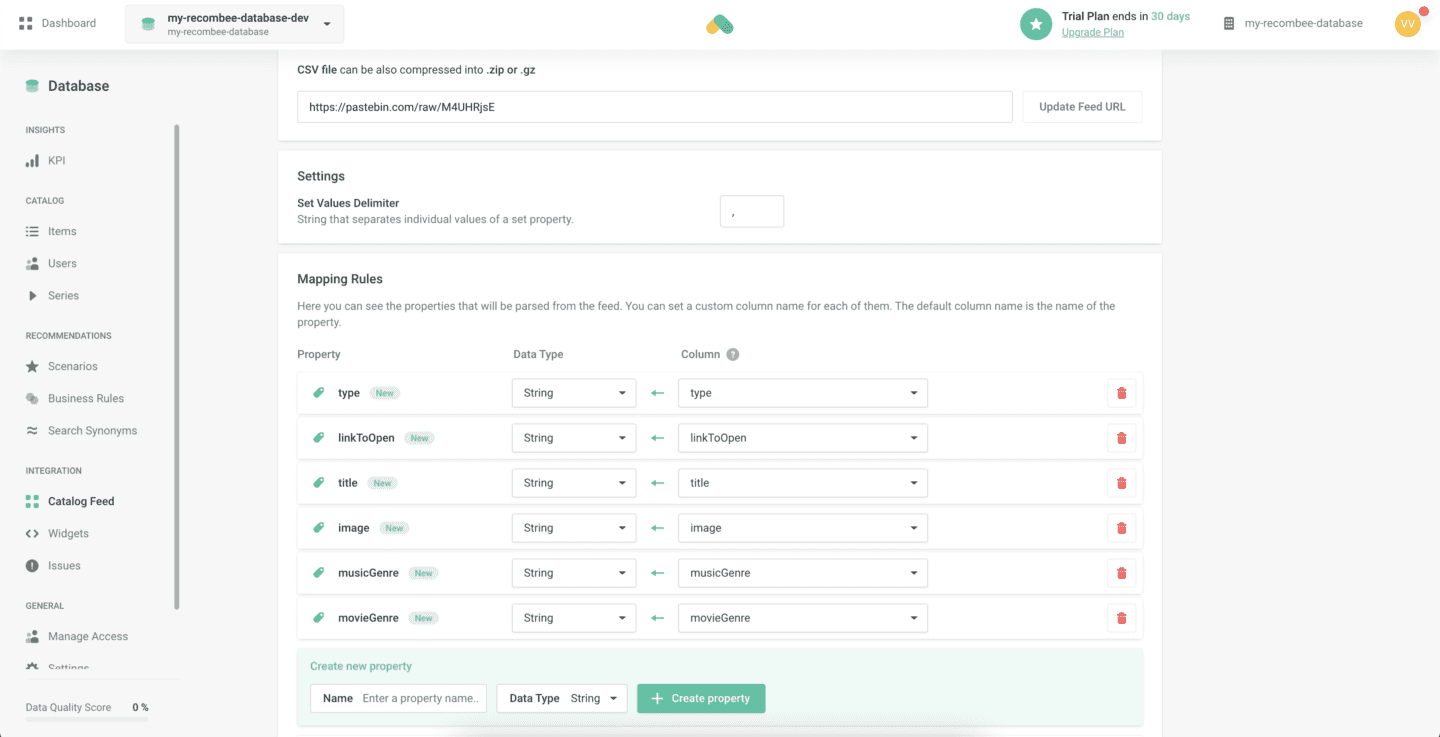
Recombee item properties
On Recombee, items have a single required property, and that’s the unique ID. However, the Recombee Chatbot extension needs the following properties to properly display recommendation items in the chat and those are:
- type, string format
- type of item being recommended, shows up in the recommendation item card
- e.g. product, song, movie, etc.
- linkToOpen, string format
- URL that will be opened in an in-app WebView when the user taps a recommendation
- metadata from this URL will be used to determine the title and image properties
- e.g. a song could link to a Spotify track
- title, string format
- fallback for linkToOpen URLs that do not contain title metadata
- the name, title or short description of the item being recommended
- e.g. product name, song title, movie title, etc.
- image, string format (a URL)
- fallback for linkToOpen URLs that do not contain image metadata
- an image to help convey what’s being recommended
- e.g. product image, album cover for a song, movie poster, etc.
Furthermore, for Recombee or you to be able to determine which item to recommend to a user, items will most likely need to have additional properties by which your Business Rules (more about these in the next section) will determine which item to recommend.
For example, if we’re making a chatbot that recommends a song and a movie, we’ll most likely have to have a **musicGenre** and **movieGenre** property for our items. To properly recommend a song or movie, it’ll have to be described with more than just genre, but for now we’ll just stick to genre to keep the guide a little easier to follow. Taking this into account, our resulting CSV should be:
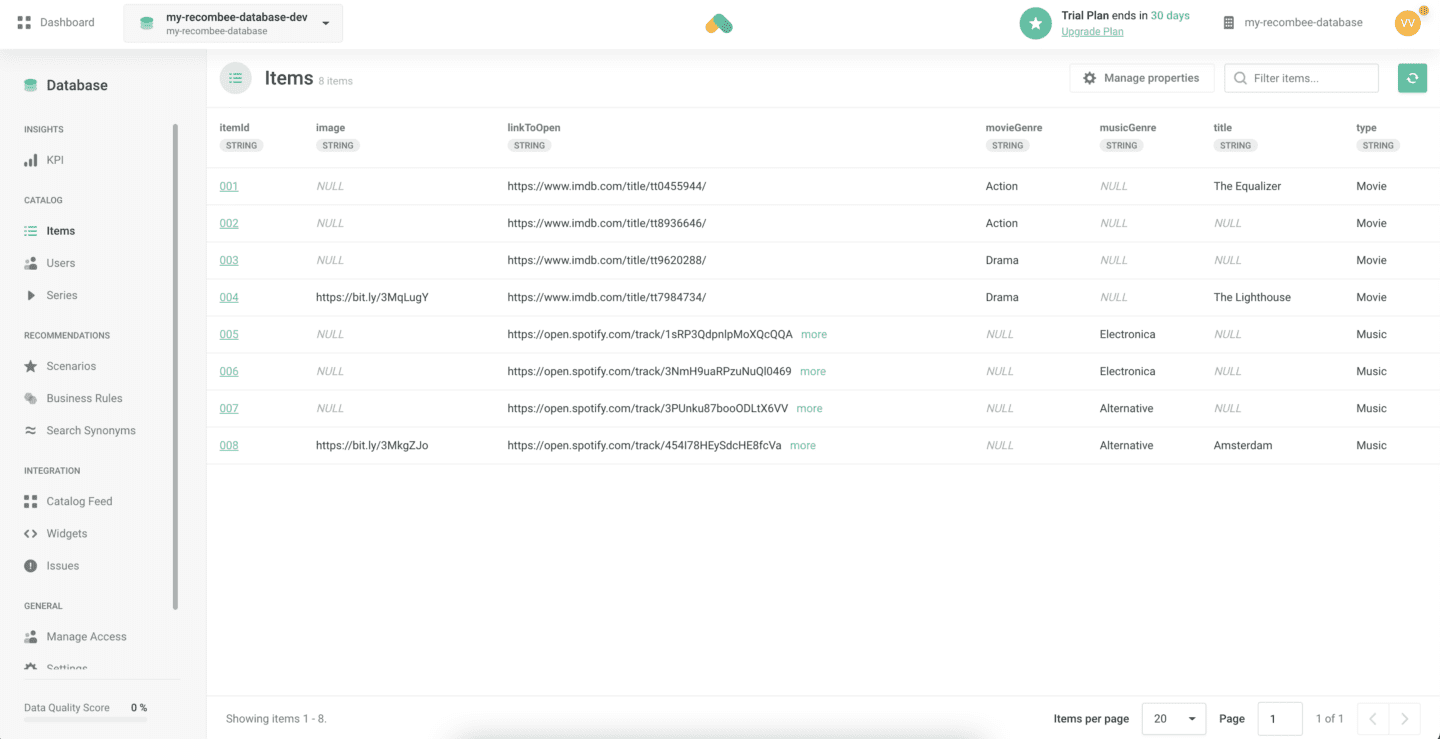
id,type,linkToOpen,title,image,musicGenre,movieGenre
001,Movie,https://www.imdb.com/title/tt0455944/,The Equalizer,,,Action
002,Movie,https://www.imdb.com/title/tt8936646/,,,,Action
003,Movie,https://www.imdb.com/title/tt9620288/,,,,Drama
004,Movie,https://www.imdb.com/title/tt7984734/,The Lighthouse,https://bit.ly/3MqLugY,,Drama
005,Music,https://open.spotify.com/track/1sRP3QdpnlpMoXQcQQA7wE?si=b51b418f708a4a76,,,Electronica,
006,Music,https://open.spotify.com/track/3NmH9uaRPzuNuQl0469jI1?si=975bb32666614952,,,Electronica,
007,Music,https://open.spotify.com/track/3PUnku87booODLtX6VVHwN?si=3bc1feff1a0a49f3,,,Alternative,
008,Music,https://open.spotify.com/track/454I78HEySdcHE8fcVabTb?si=bf35c1de2fa94bb0,Amsterdam,https://bit.ly/3MkgZJo,Alternative,
Again, only the **id** is required to add items to Recombee, but for items to be displayable in the Recombee Chatbot, we also need at least linkToOpen (if it has suitable metadata), but ideally also type, title and image properties. Furthermore, you’ll want to include the additional properties such as **musicGenre** and **movieGenre** in order for your Business Rules (more about them in the next section) to be able to choose which items to recommend to an app user.
We’ll use this CSV for our example chatbot that recommends a song and a movie depending on the answers the app user provides. Let’s add it to our Catalog Feed on Recombee, add properties for each value from the CSV and start the import.
It may take a moment for Recombee to import the data, but no more than a few minutes for a small CSV file like the one we linked.
Now we can get to work adding some Scenarios so we can tell Recombee which items to recommend to which users depending on their Recombee user property values.
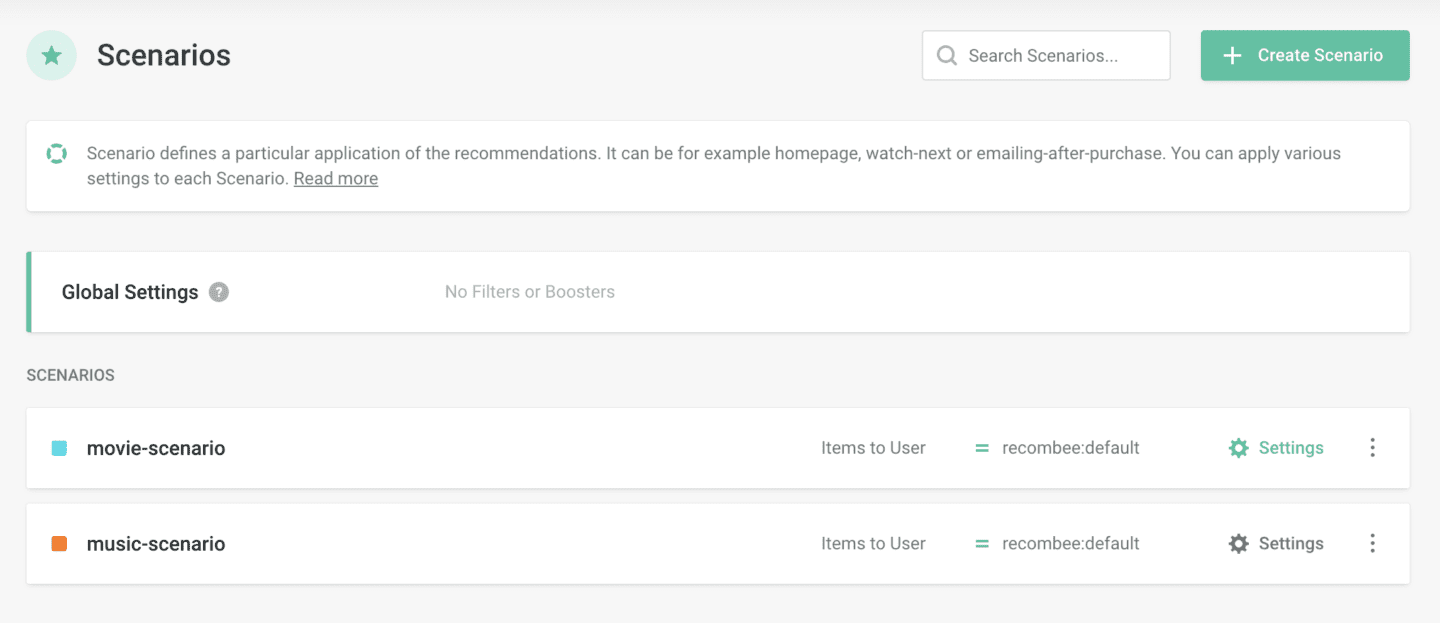
Scenarios
On Recombee scenarios are used to determine how you want Recombee to handle your request. You can read more about them in Recombees documentation here.
In the Recombee Chatbot extension, each scenario will be used to recommend a single item of a specific type. For example, music-scenario will recommend music to the app user, while movie-scenario will recommend a movie. So let’s create the movie-scenario first. We go to the Scenarios sidebar tab on Recombee and click on Create Scenario.
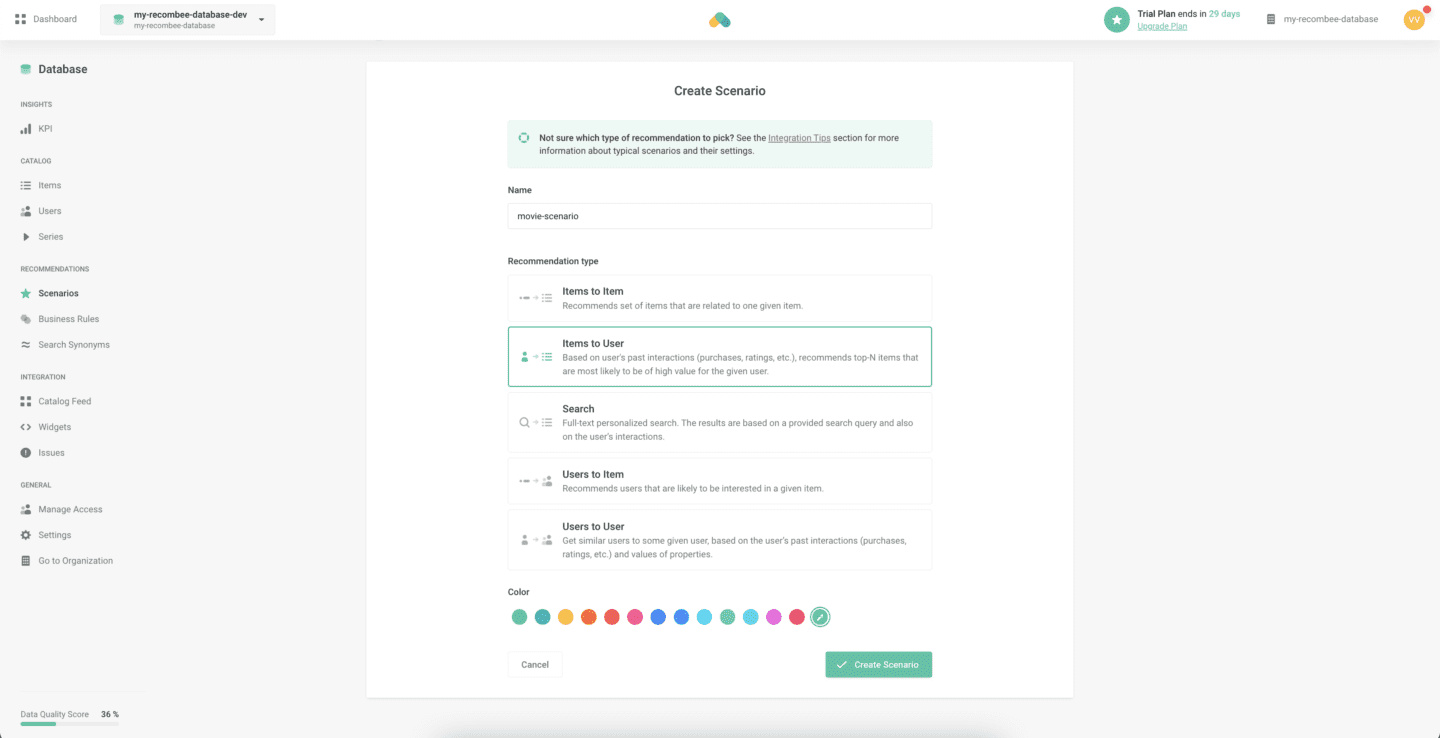
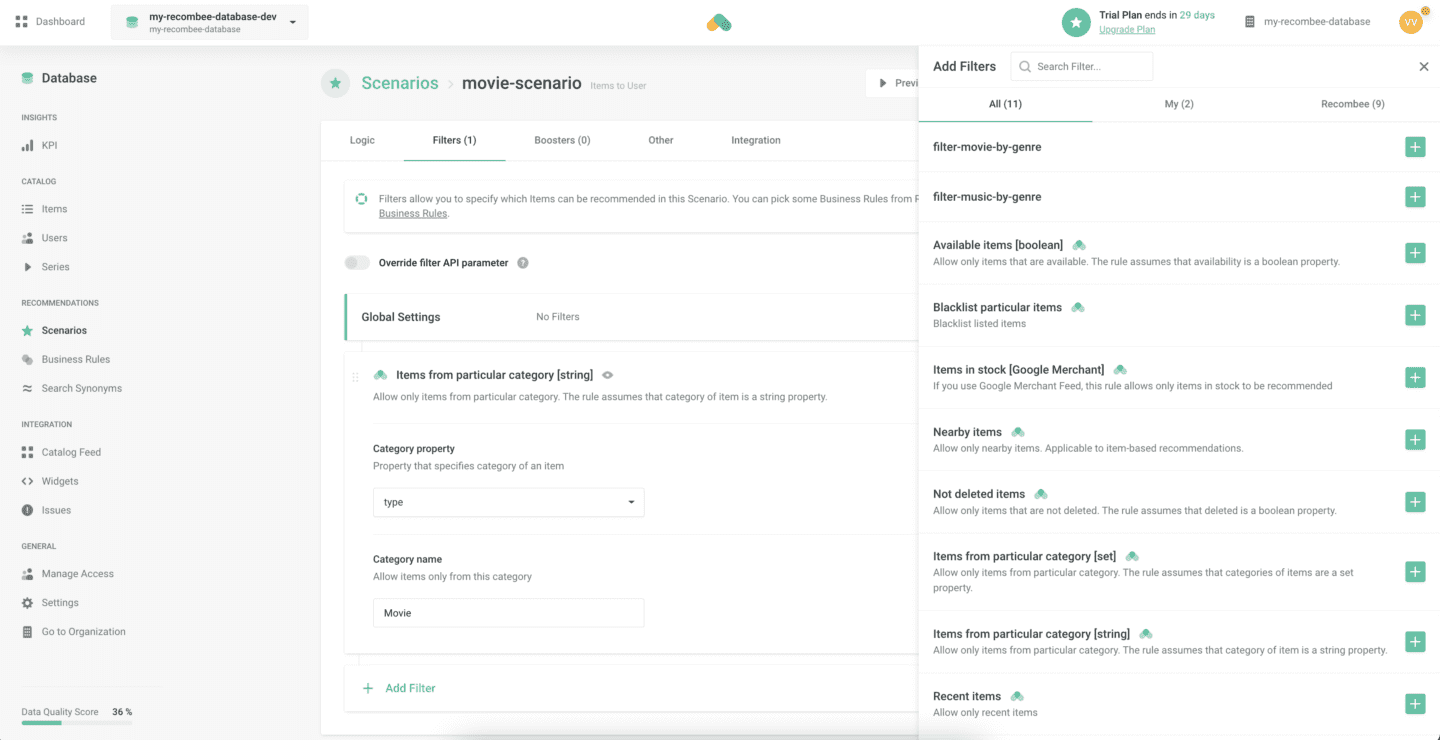
Once created, we go to the Filters tab of the scenario and click on “Add first Filter”. There we want to add the Items from particular category [string] pre-made Recombee rule. We use this to determine which type of Recombee items we want to recommend using this scenario.

Choose type item property as the Category property.

Now add Movie for the Category name and click “Update settings” in the top right corner.

We’ll do this same process for music_scenario.
Now that we’re sure that movie-scenario will only recommend Movie type items and music_scenario will only recommend Music type items, we can create some custom logic that will use an app user’s chatbot answers to determine which movieGenre or musicGenre it should choose movies or music from to recommend to the user. Since this is only an example, we’ll have two possibilities of genre and only two items per genre, but you can of course make this as complex as you want to. To add this logic, we’ll have to make our own Filter in Business Rules.
Business Rules
Selecting the Business Rules sidebar tab lets us create Filters and Boosters. Put simply, Filters make sure only items matching specific criteria can be recommended (e.g. only Movie type items), while Boosters make sure that items matching specific criteria are more likely to be recommended, (e.g. ones you pick out as best value or most popular). For more information on how to create Filters and Boosters as well as what they are, you can check Recombee’s documentation.
Custom Filters
In our example Recombee Chatbot, we ask the user what their favoriteMovieGenre and favoriteMusicGenre is, offering them only two options for each (more about this in the Questions section later).
If a user chooses that their favoriteMovieGenre is Action, we want to recommend an Action movie to them, so lets make a Filter that will make that happen, let’s click on Create Rule.

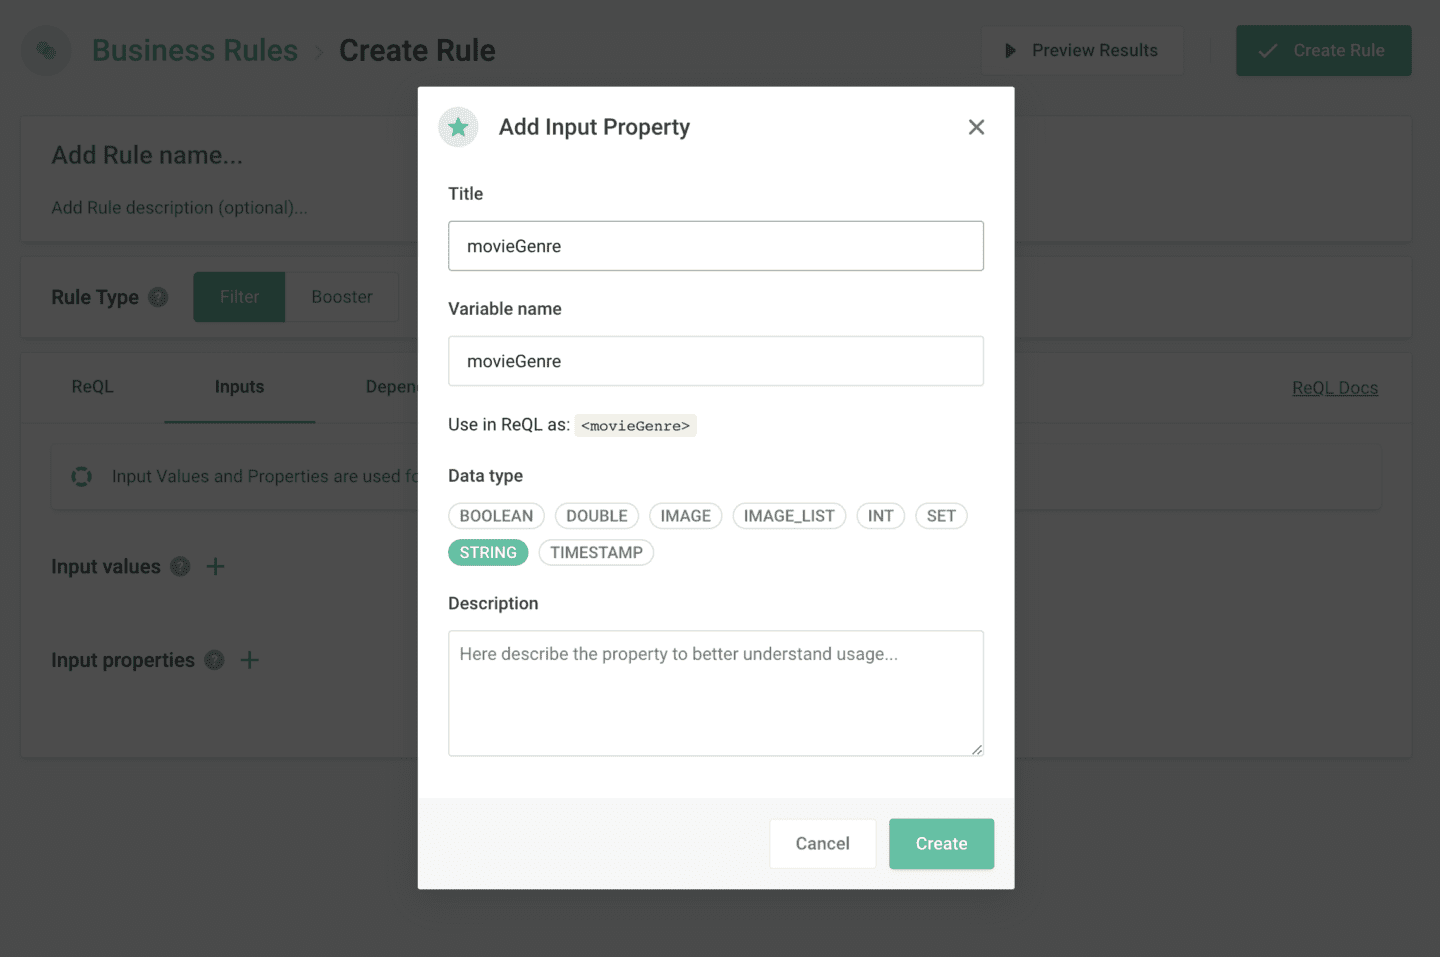
We name the rule filter-movie-by-genre. By default the rule creation dashboard chooses a rule type of Filter and entity type of Items for our new rule, this is exactly what we want so we don’t have to change that. We have to add an input property for our rule, so we click on the Inputs tab and click the add input property button.
The input property will be movieGenre, we also want to customize the ReQL property so it matches the capitalization (moviegenre should be replaced with movieGenre) and it should be a string type. You can optionally add a description, this is best used when the property name isn’t self explanatory.
Now the ReQL code has to be added. Since Recombee should recommend a movie belonging to the genre the app user answered was their favorite (stored in the user’s favoriteMovieGenre property) we write the following code:
if context_user["favoriteMovieGenre"] == "Action"
then
== "Action"
else
(if context_user["favoriteMovieGenre"] == "Drama"
then
== "Drama"
else
== "Comedy")
If a user’s favoriteMovieGenre is Action, we filter items that have have a movieGenre property set to Action. Same with Drama, but if anything else is selected, Recombee will recommend a movie that’s either a Comedy as a fallback.

Clicking Create Rule in the upper right corner will add this custom Business Rule for us to use in our Scenarios. Let’s make another rule like this, but for music. We go back to the Business Rules sidebar tab, we click Create Rule in the top right, name the rule filter-music-by-genre, add musicGenre as our input property, use the ReQL code below, click Create Rule and we have a our music filtering rule.
if context_user["favoriteMusicGenre"] == "Electronica"
then
    <musicGenre> == "Electronica"
else
    (if context_user["favoriteMusicGenre"] == "Alternative"
    then
        <musicGenre> == "Alternative"
    else
        <musicGenre> == "Pop")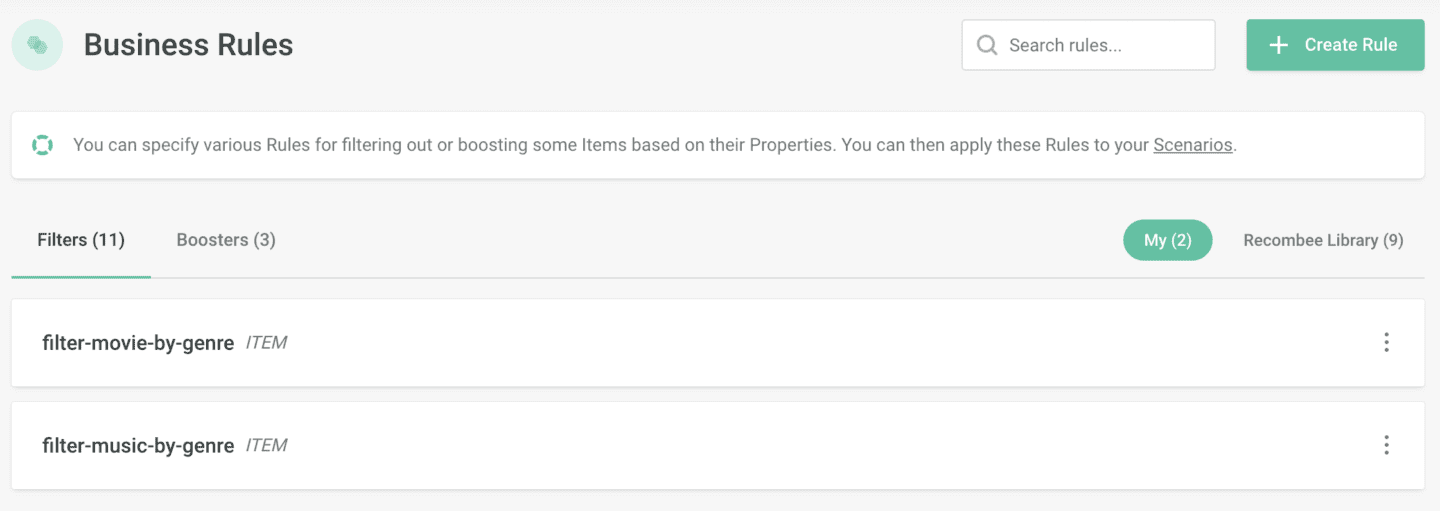
We now want to add these rules to their respective scenarios. Any rule can be added to any scenario of course, but filter-movie-by-genre and filter-music-by-genre should be added to the movie-scenario and music-scenario respectively.
After selecting the Scenarios tab in the sidebar, we click on the Settings button for the movie-scenario.
We now go to the Filters tab, click on Add filter and this will let us add the filter-movie-by-genre filter we created.
The movieGenre item property needs to be set for the movieGenre input property of the filter.

We update the scenario settings by clicking Update Settings and repeat this process for for music-scenario with filter-music-by-genre. With that, we’ve set up our Recombee database and can proceed to the Builder to set up the chatbot.
Recombee Chatbot extension setup
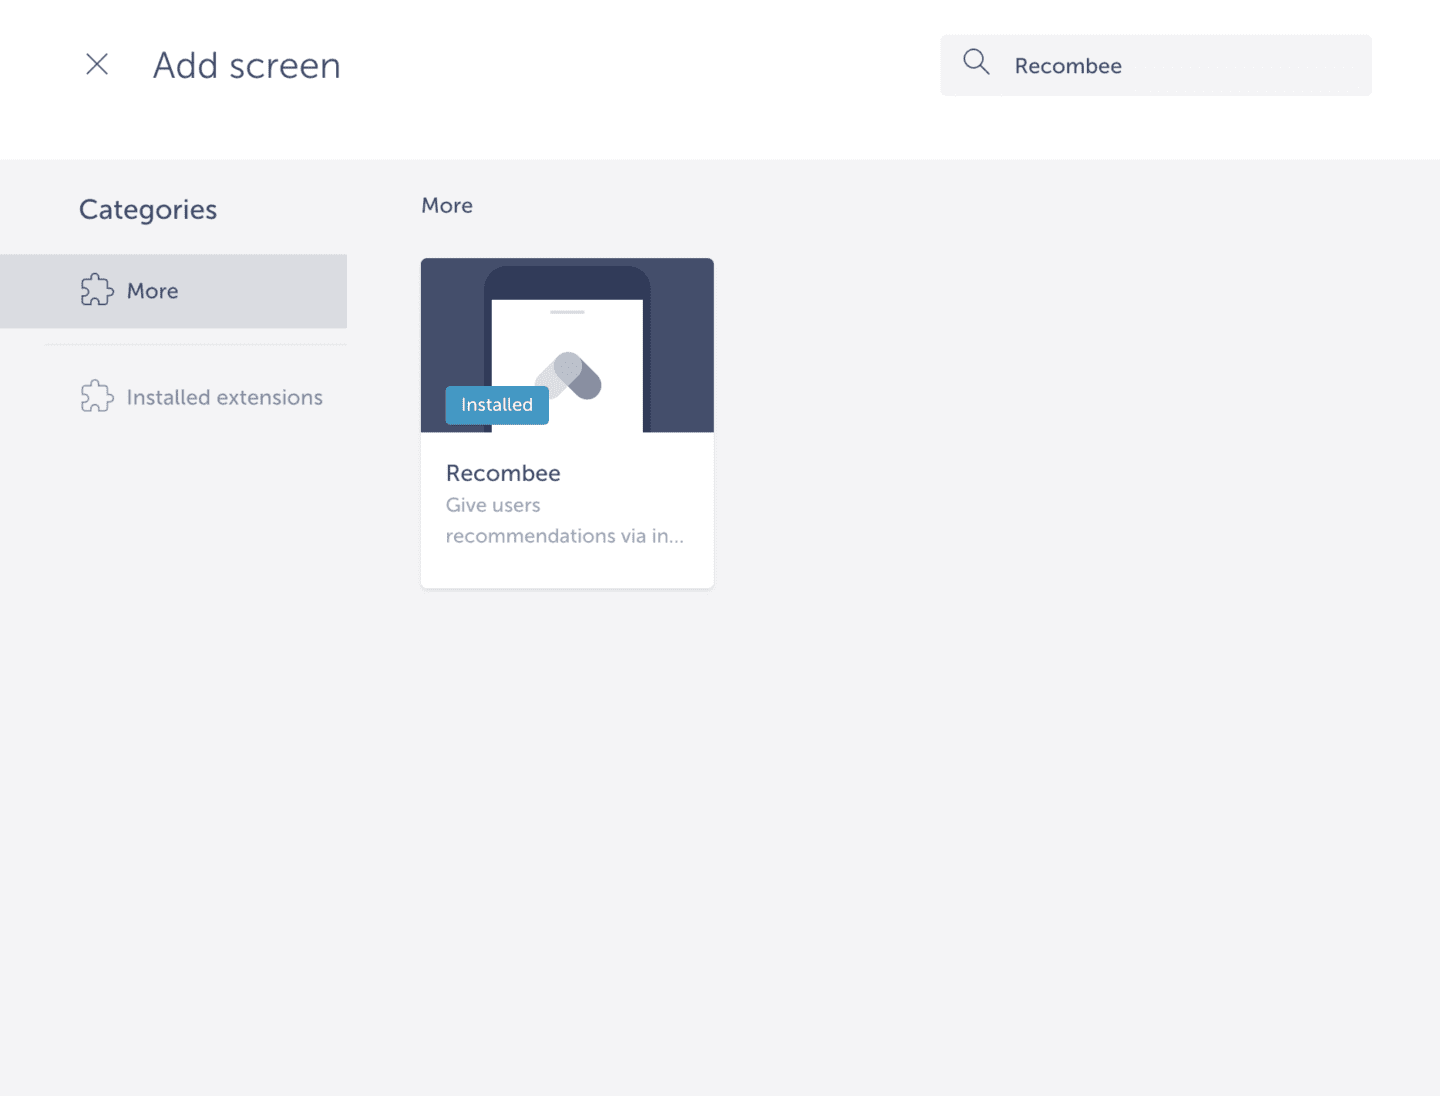
Now that the Recombee database is set up and ready for the Recombee Chatbot extension to utilize it, the extension can be configured. To get started, we add the Recombee shortcut by clicking the add screen button and searching for Recombee. If you don’t have it installed, the Builder will prompt you to install it so it can add the screen.
We also want to add a user profile screen so we can utilize user profile information on Recombee if we’d like.
Connecting the chatbot to the database
To make sure our app can communicate with the Recombee API, we have to provide the name, public and private token of our Recombee database in the Recombee Chatbot extension settings, so we select the Settings tab on the sidebar and then select Recombee under Extension Settings. You can find this information about your database on Recombee in the Settings tab in the sidebar, at the end of that page.
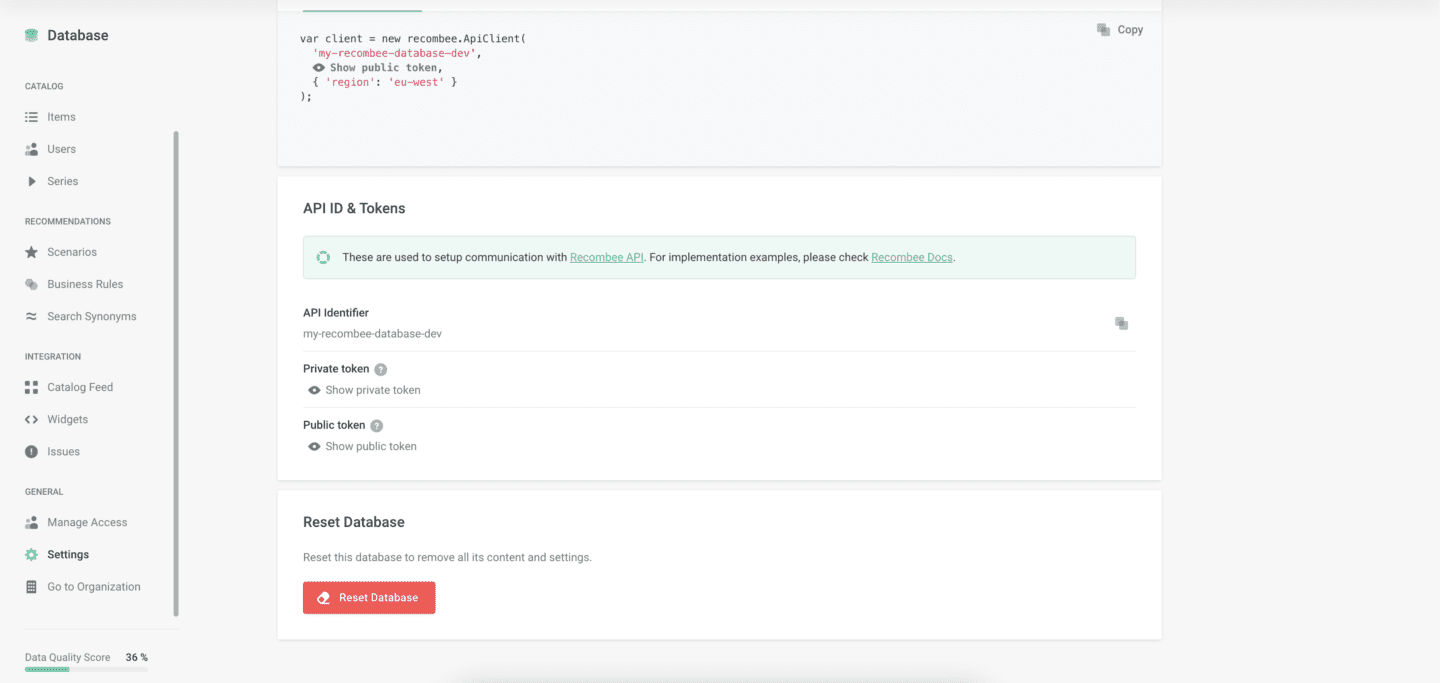
The database name is used to know which database the app has to connect to, the private token is used to set user properties and the public token is used to request recommendations for the app user.

Adding scenarios to the app
Our app needs to know which scenarios it should be using, so they need to be added to the shortcut settings page. This is done back on the Screen sidebar tab, on the Recommendation Chatbot screen, in the Scenarios settings page. The scenarios we created are movie-scenario and music-scenario, so we add those.

For each scenario added, the chatbot will send an individual request to Recombee for 1 recommendation item generated by the given scenario’s business rules. In our case, movie-scenario will return 1 movie type item with a specific movieGenre property and 1 music type item with a specific musicGenre property.
Adding questions to the chatbot
In our example, we’ll be using questions to determine an app user’s favoriteMovieGenre and favoriteMusicGenre. To do this, there have to be two questions in our chatbot, so let’s add them. On the Recommendation Chatbot screen’s Questions settings page tab, we click on the Add item button.

This will open a form with the following fields:
- Question name (required)
- identifies the question on the Builder, app users will not see this
- Order position
- imposes a custom order of questions if you decide to change the order
- has to be an integer value
- Recombee user property (required)
- determines which Recombee user property will be updated by this question’s answer
- Question text (required)
- the text that the chatbot sends as a question message, this is what the user is asked
- Answers (required)
- array of text inputs, there can be as many as necessary
- the text that the app user sends as a message after picking the corresponding answer button
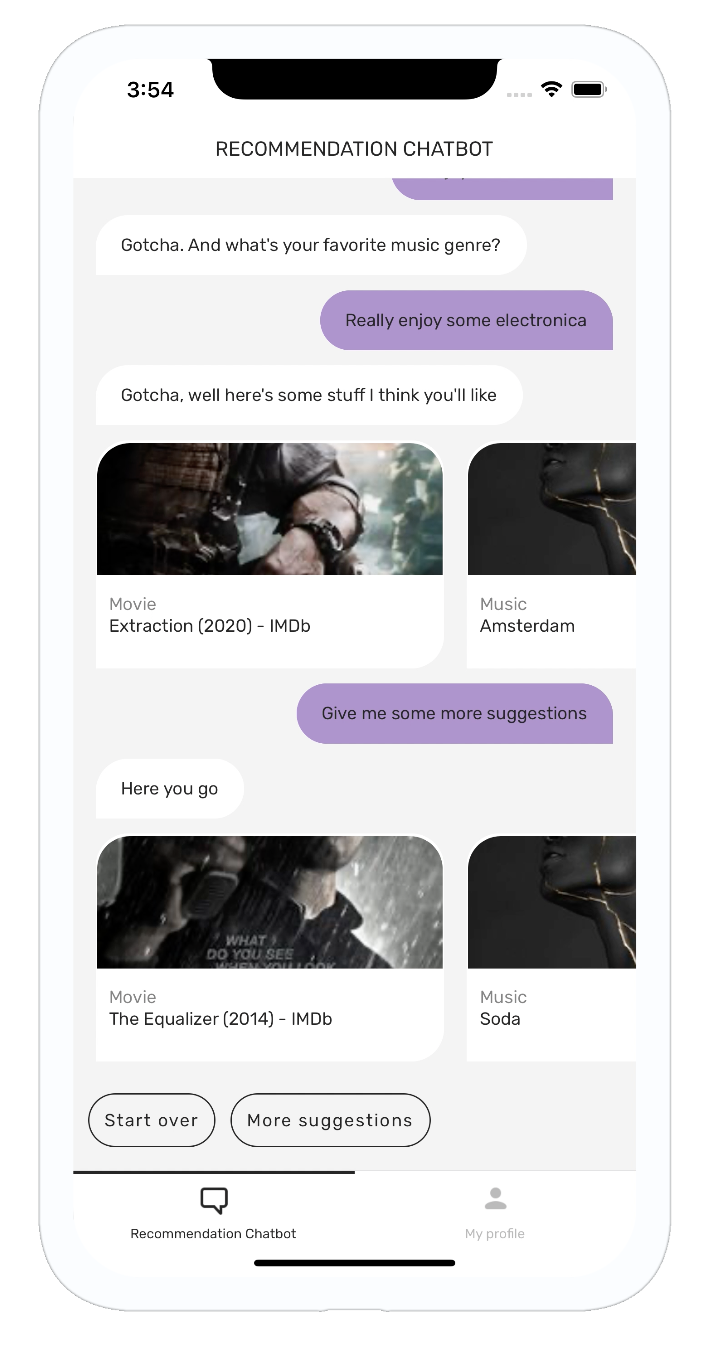
- for example, in the image below, an app user will tap the Action button and the message he sends will be “I enjoy action movies”
- there must be the same number of Answers and Answer button labels and they must be in the same order, where the first Answer corresponds to the first Answer button label
- Answer button labels (required)
- array of text inputs, there can be as many as necessary
- ideally short enough for just a button, one short/long or two short words
- text that answer options will display so the user knows how they are answering the question
- there must be the same number of Answers and Answer button labels and they must be in the same order, where the first Answer corresponds to the first Answer button label
Filling these out with the following info:
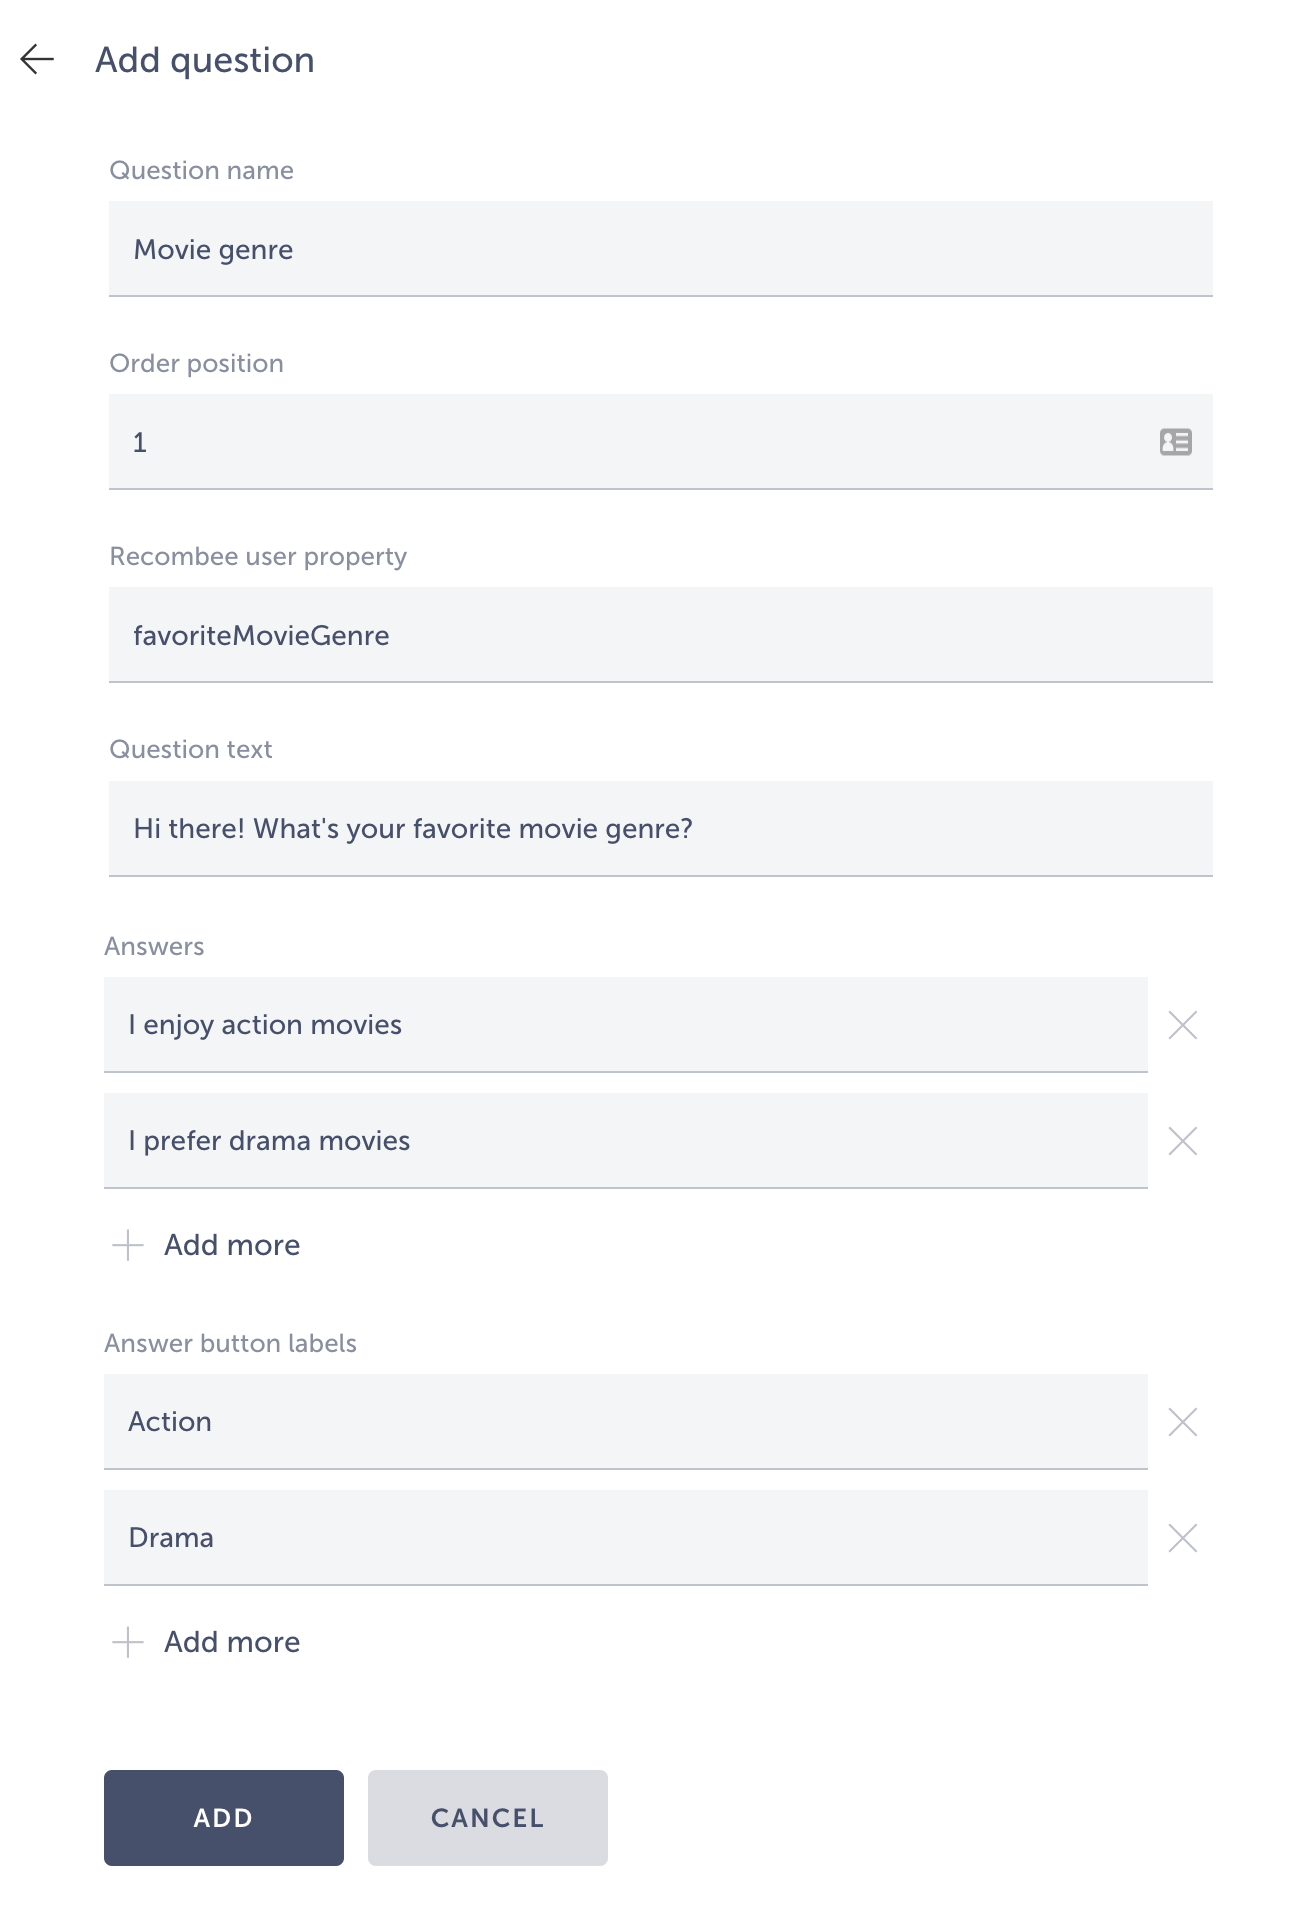
Will result in a question that sets the favoriteMovieGenre property for the app user on Recombee. We should create one for favoriteMusicGenre too.

You’ll notice there’s a “Status” property for each question, where the status can either be Active or Hidden, depending on the switch. This can be used if you want to remove a question from the chatbot temporarily, so you don’t have to re-create the question. Order position will remain the same even if you hide a question other than the last one.
With this done, the chatbot is ready to be used. After the preview of the app launches, we can create a user, fill out the user profile, then answer the chatbot questions to get some recommendations.

If we check on Recombee, we’ll see that our app user was added and their answers and user profile information was stored in the correct Recombee user properties.

Custom chatbot message for the first set of recommendations
If we want to make the chatbot send a message after the user gives their last answer, but before the chatbot displays the first set of recommendations, we use the Recommendation Message shortcut settings page in the Builder. There we can specify what the message says, you can even make it specific for whichever language the user decides to set for the app.
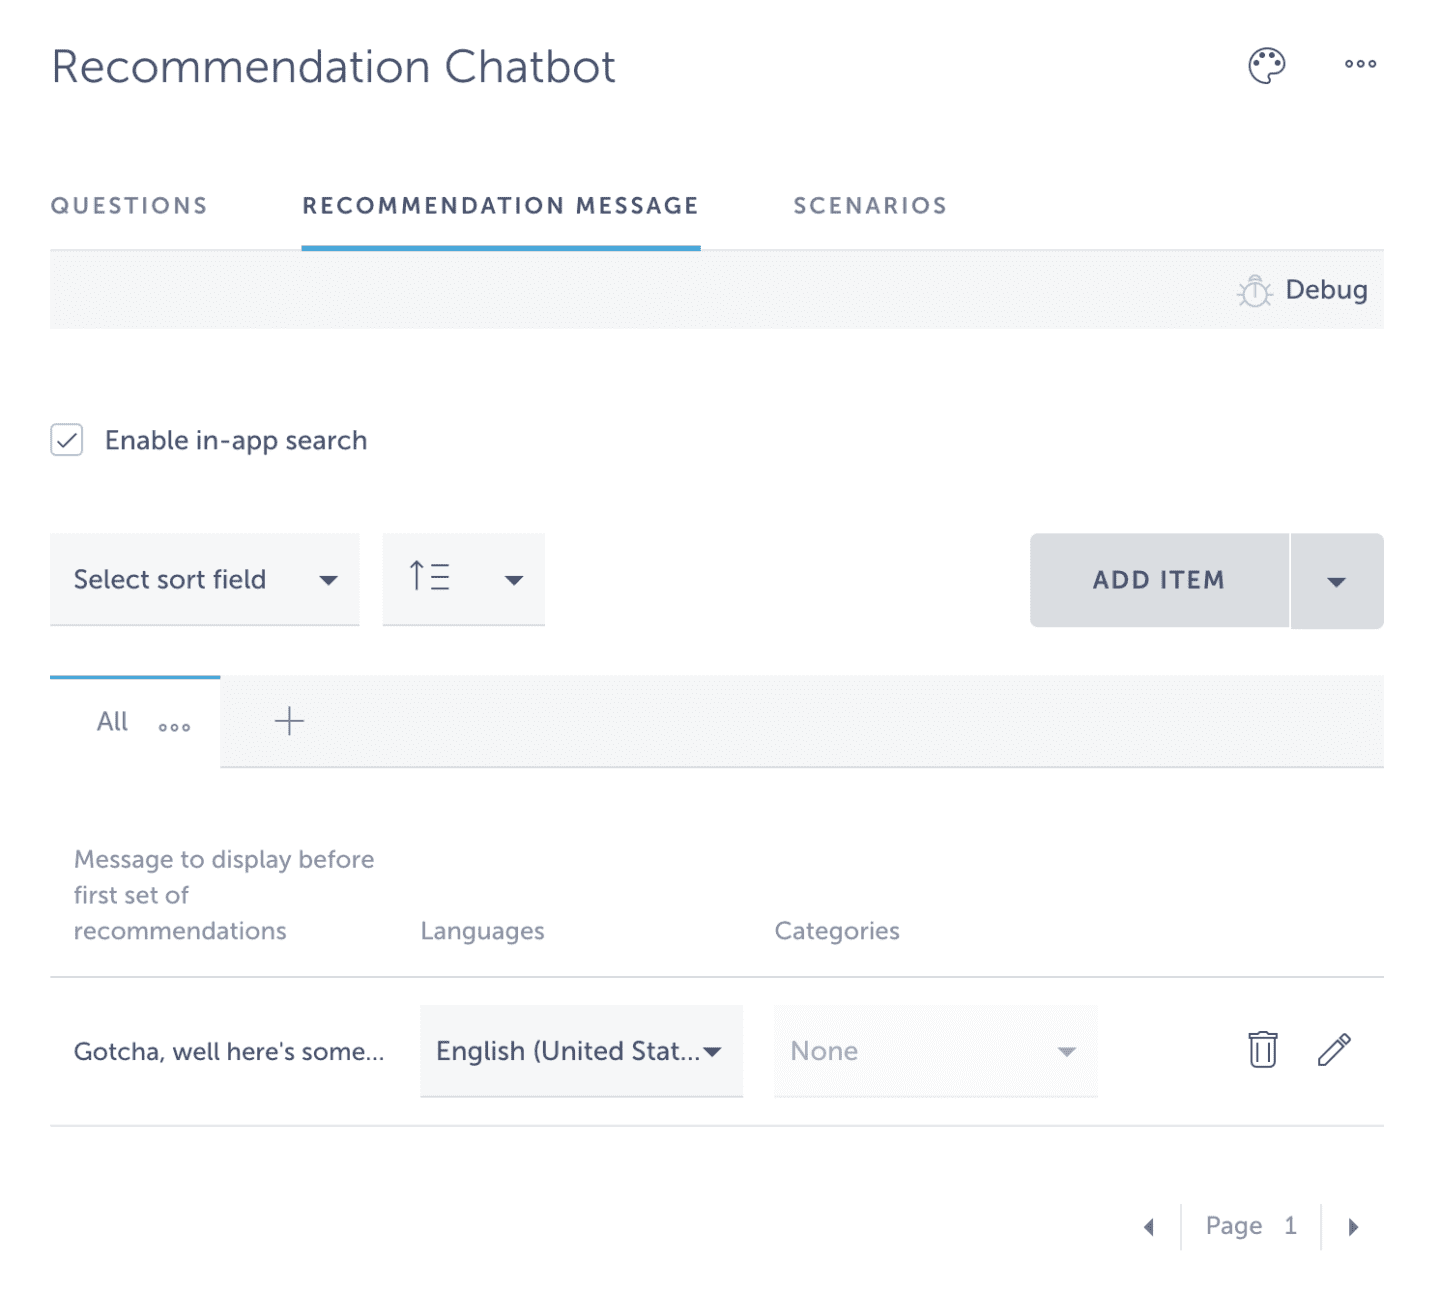
This will add an extra message before the first set of recommendations given by the chatbot.