If you’re interested in mobile app development, then you need to make sure you understand how to build a cross-platform app for both Android and iOS. Without good attention to cross-platform functionality during mobile app development, you’re cutting your audience down substantially and therefore significantly reducing profits before you’ve even begun.
For instance, while iPhone has more cachet in some circles than Android, its market share is dramatically smaller. According to Statista, “Android maintained its position as the leading mobile operating system worldwide in the third quarter of 2023 with a market share of 70.5 percent. Android’s closest rival, Apple’s iOS, had a market share of 28.8 percent during the same period.”
Naturally, you’d never want to ignore nearly a third of the market. There are major benefits to having an app available on both major mobile platforms. Not only can you make more money with subscriptions and in-app purchases, but word-of-mouth marketing crosses the technological aisle and helps you deepen your brand recognition.
But how is it done? If you’ve been frantically googling “build app for Android and iOS,” you’re not alone – and you don’t need to worry. Mobile app development is challenging, but far from impossible.
In today’s article, let’s discuss the developmental differences between Android and iOS, the main types of apps, how to build a cross-platform app manually, and our secret no-code hack for creating an app more easily than you thought possible.
Let’s get started!
Developmental Differences Between Android and iOS
Most consumers can give you a basic idea of the differences between Android and iOS. While Android is more customizable and PC-like, iOS is generally credited with being easier for users to engage with.
However, they have some significant technical distinctions. The main differences include:
- Programming languages: iOS mostly relies on Swift and Objective-C to develop its apps. In contrast, Android primarily uses Java (not the same as JavaScript) and Kotlin. Both of these enable the developer to write robust code, but they’re written in different languages. Think of this like spoken languages, which all contain deep meaning but cannot “talk” to each other without translation, but programming languages such as Swift, Java, or Kotlin all have powerful app development abilities.
- Integrated Development Environment (IDE): An IDE is a software app that helps you create code more quickly and effectively. According to Apple, “Xcode 15 enables you to develop, test, and distribute apps for all Apple platforms” and is the preferred IDE. Android uses Android Studio. However, you can build apps without using either one if you want to.
- UI Design: Android mainly uses XML layouts, which are essentially wireframes that depict different layouts within the app and the screen elements they contain. Apple’s iOS has historically relied on storyboards, which are a visual design method that shows app progressions. Today, though, there’s a push to move to Swift UI over storyboards, since it allows you to build code faster.
- Interface elements: Related to the above, iOS uses UIKit for design and has recently introduced SwiftUI for the user interface. Android uses Views and ViewGroups. These elements are intended to give you a working interactive skeleton of how the app operates on Android or iOS devices while coding but before fully designing.
- Open-source vs closed-source: While parts of iOS are open-source under the Apple Public Source License and others, it is generally closed-source. However, Android is primarily free and open-source under the Apache License, with some closed-source elements. Why does this matter? Because the more open the OS, the more outside developers can make changes to it.
- Security: Android has been accused in the past of being less secure. However, in recent years, it has beefed up its security by using stricter protocols to protect its file system: e.g. how apps can access the OS and one another (by default, they cannot do the latter at all). Apple, on the other hand, has a longstanding reputation for stringent security by sandboxing apps, meaning all files run in a contained environment that cannot affect what’s outside it.
Despite their differences, both iOS and Android development are straightforward enough if you know what you’re doing. Let’s take a look now at another important component of building robust and user-friendly Android and iOS applications.
Native vs. Progressive Web Apps (PWA) for iOS & Android
Cross-platform mobile applications can take two basic forms: native and progressive.
Native web apps are designed specifically for the device on which they’re intended to run, hence “native mobile apps.” Their user interface is specially designed for that OS, and that one alone.
Accordingly, you’ll need to build a separate app for both iOS and Android. While it will function the same way, the underpinnings of each app are different vis-à-vis programming languages, development processes, and device requirements.
On the other hand, progressive web apps employ a single codebase designed to run in any ecosystem, from a browser to handheld iOS or Android devices. That means you can develop one single app that renders anywhere, reducing the workload but also compromising some of the functionality and beauty of native apps.
If you’re looking to build app for Android and iOS, it’s important to understand the benefits and drawbacks of each type.
Native Apps
- Built specifically for one platform: Because native apps are designed only for one OS, they employ the same functional approach as that OS, which makes it easy for you to follow the exact specs laid out by the platform. However, this means you can’t build one native app and put it up on both app stores.
- Uses platform-specific programming languages and tools: Because iOS and Android have distinct languages and tools for development, one does not apply to another. Many consider this a drawback of native apps.
- Overall better performance and smoother UI: Because native apps can access platform-specific features of an OS and offer them to users, most users find the experience smoother and better when using a native app.
- More work required to build for both platforms: Reinventing the wheel for each platform will obviously require more work than doing it just once. This also means it’s often more expensive to develop cross-platform mobile applications, because you’re essentially paying for two different apps.
Progressive Web Apps (PWAs)
- Built using a cross-platform framework: A progressive web app creates apps that will run on both operating systems, as well as the web, without a hitch. (Note that this is not the same as a web page for a browser, which can be rendered on any device but isn’t designed to load quickly and work equally well in every environment the way a progressive web app is.)
- Code is written in one language that targets both platforms: Progressive web apps use JavaScript as the backbone for the app’s code. This runs equally well on both platforms, but is rendered natively before it gets to the user, making it seem fully “native.”
- UI is rendered using the framework and not with native UI components: Because the app isn’t using native UI components, you don’t have to create two separate applications. However, while users treat the app in many ways the same as a native app (saving it on their home screen, getting push notifications, working offline, etc.), it isn’t tied into the OS, meaning it can’t use the phone’s resources so tends to run slower and less efficiently.
Next, let’s discuss what it takes to build your cross-platform app manually.
7 Steps to Manually Build a Cross-Platform App
Before deciding between a manual and no-code approach, it’s helpful to understand exactly how to design an app for cross-platform distribution.
1. Choose a Framework (like Flutter or React Native)
First, where are you going to develop your cross-platform app? That’s where a framework comes in.
Techopedia explains that an application framework is a “software library that provides a fundamental structure to support the development of applications for a specific environment. An application framework acts as the skeletal support to build an application.”
The best approach is to use a cross-platform framework so you can avoid the burden of building the same app twice. The typical choices include React Native, Flutter, Ionic, Xamarin, and NativeScript.
Each of these has its benefits. For example:
- Flutter has a great built-in graphics engine
- React Native is open-source and has good community support
- Ionic is one of the easiest PWA solutions out there
- Xamarin lets you build 90% of the code for Android, Windows, and iOS at once
- NativeScript offers all native APIs, so you can build native-like apps easily
Of course, this is an extremely superficial overview. Part of the challenge of building an app manually is doing a deep dive into the pros and cons of each framework before selecting one.
2. Set up Development Environment
Once you’ve chosen your framework, you need to set up your IDE, or integrated developer environment, to build code. As discussed, Android Studio and Xcode are the go-to choices for Android and iOS respectively. If you’re building native apps, it’s a no-brainer which to use.
Visual Studio is also a popular choice for Windows, macOS, and Linux. If you’re designing apps you want to work well in web browsers, this is a good option.
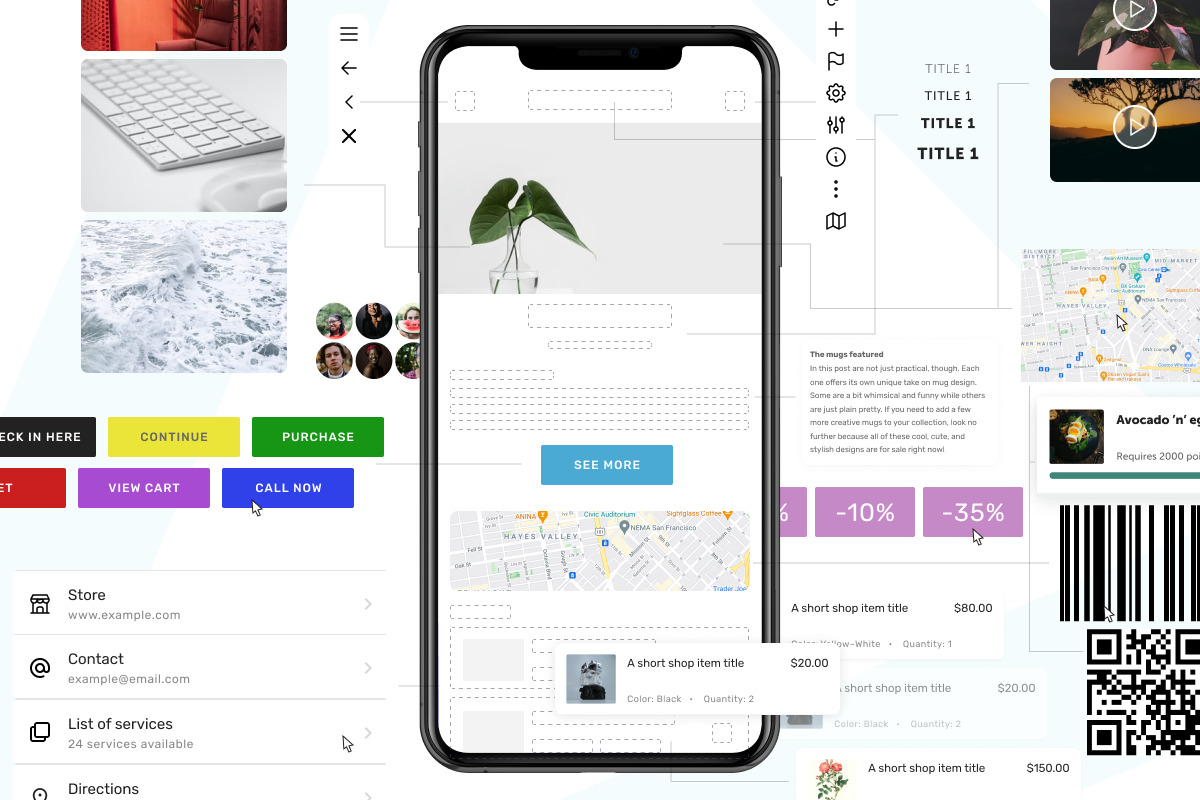
3. Design UI/UX Mockups
Visualizing your mobile app and user experience is important, so you need to literally “see” how your user interface will work. Thus, it’s time to create mockups of your app’s UI and UX. You’ll want to:
- Sketch out the initial wireframe of the app interface
- Think through each potential path in the app
- Keep mobile accessibility in mind
- Iterate the app’s UI for the optimal user experience
No matter the goal of your app, its UI/UX should ensure that the end user can seamlessly navigate the app regardless of whether they downloaded it from the Apple App Store or Google Play Store.
The next step in how to make iPhone apps or Android ones is to write shared business logic for both platforms. This allows your app to handle the exchange of information between its database and the user interface, regardless of which platform the app operates on. This means:
- Understanding the requirements for each operating system, including Android devices, iPhone, macOS, etc.
- Determining how real-time functionality will work
- Thinking through all aspects of app design, from access to transactions to notifications and updates
5. Access Native Features Using Framework APIs
Your next application development challenge is to hook into native features using framework APIs. When building a cross-platform mobile app using a framework like React Native or Flutter, you can still access some native platform features, tapping into functionality normally only available through the platforms’ individual SDKs (software development kits).
In so doing, you can create a high-quality, user-friendly experience that will make your app idea stand out.
6. Test on Both Platforms
The last step in app creation is to test it to make sure it works seamlessly across platforms. Does it work as well for Windows as it does for macOS? Does each plugin function as intended? Have you protected the software you don’t want to be open-source? Do the frontend and backend operate efficiently? Is there anything else to debug?
Testing before your app gets to users is critical. Although you can continually iterate on an app’s performance to improve the user experience and resolve bugs or issues, it’s ideal to work it all out during your first round in the app development platform.
7. Publish to the App Stores
Once you’ve tested your cross-platform app, it’s time to turn it over to the world via the App Store and Google Play Store. That means arranging for marketing, getting some reviews, and enabling sharing – among other important features of how to launch a mobile app.
Using a No-Code App Builder to Create an Android/iOS App
If the seven steps above made you a little short of breath, that’s okay. Most startups, e-commerce shops, and entrepreneurs aren’t coders.
No-code app builders are here to help. With a shorter timeline, lower cost, and fewer potential ulcers, more and more people with big ideas are choosing to go this route.
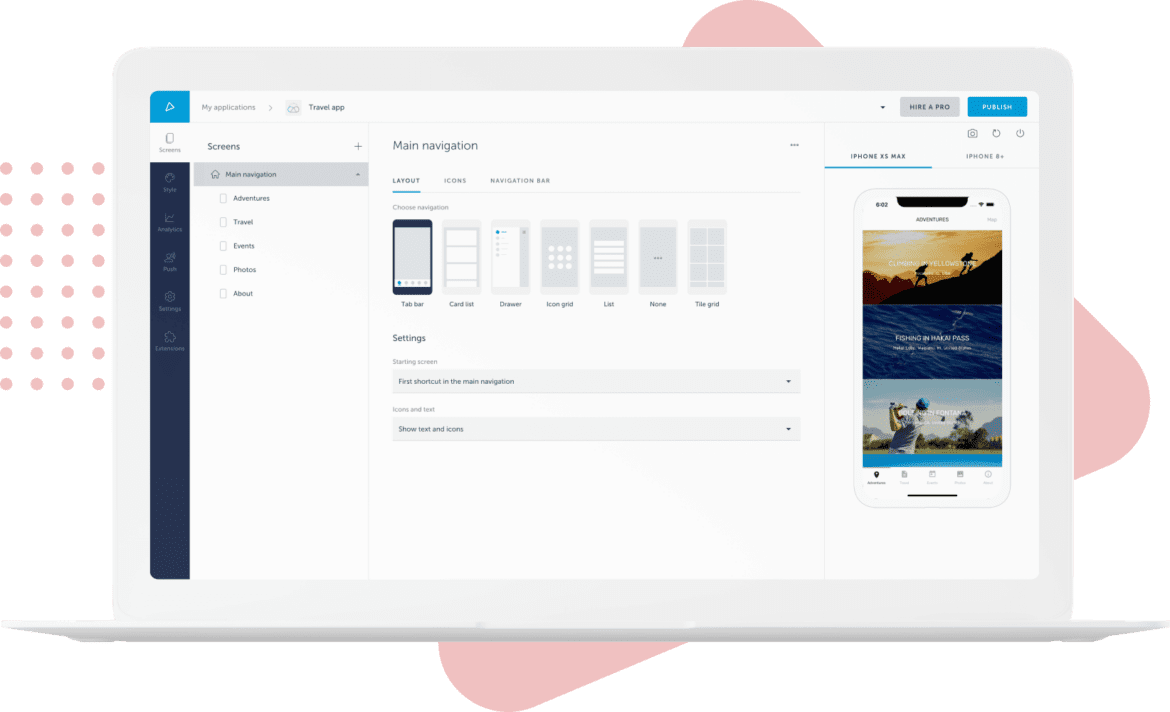
1. Create a Wireframe
When learning how to create an app the no-code way, it’s important to start with a wireframe. Outline how you want the structure of your app to work, how it should look, and how screens and features will function. The wireframing process will help you identify any core functions and required screens your app needs such as user logins, profiles, or content feeds.
2. Select a Pre-Built Template
No-code app builders offer easy-to-use drag-and-drop templates that match your wireframes. Choose one to serve as the foundation of your user interface and design.
3. Choose Your Features
Next up, add any pre-built modules or features your app will need. These include push notifications, image galleries, social media integrations, and so on. Add as many features as needed to make your app work robustly and accomplish the user’s goals, but not so many that it gets overwhelmed with bells and whistles.
4. Publish Your App
Voilà: it’s time to publish your app. First, make sure there are no bugs, then submit it to the App Store and Google Play Store for approval.
Yep, it really is that simple. The only question remains: exactly which no-code builder should you use?
Building Your Cross-Platform App with Shoutem
Creating a cross-platform app that you can make available on both the App Store and the Google Play Store requires some planning, but it’s very doable. It’s also very worth it. By making your app available to both device types, you can significantly increase your market share and profits, and ensure your word-of-mouth marketing has crossover.
While you can manually build the app (if you have the coding skills) or hire a developer (if you have the money), it’s super easy to use a no-code app builder to do the job for you. That way, you can quickly and easily launch a beautiful, perfectly branded app.
Shoutem is easily the best of these, letting you design cross-platform apps with a native feel but without pesky native app requirements that require double the coding and design. With drag-and-drop templates, pre-built app features, tutorials, and easy integrations, you can get your app up and running in a matter of days. You can use the integrated app preview tool to test your app before releasing it into the wild, incorporate premade app builder features such as media, events, or articles, and more.
If you’re in the market for an easy way to design cross-platform mobile apps, Shoutem is here for you. Sign up for a 14-day free trial to see what it’s all about today!
Building Apps for Android and iOS: FAQ
Have a few more questions about the development process, from doing it yourself to using a no-code app builder? Here are some answers.
How much does it cost to create an app for iOS and Android?
According to Business of Apps, the cost of developing a mobile application can range anywhere from $16,000 for a simple app to $72,000 for a complex one. Keeping a US app developer on retainer costs about $105,000 per year, so it’s far from cheap – but it’s also far from required.
How can I make an app for Android and iOS for free?
If you want to develop an app for free without learning complicated coding skills, you can. Use a no-code app builder like Shoutem to build your mobile app from the ground up with zero development expertise. Many online app builders – Shoutem included – offer free trial periods that allow you to start developing your app for free.
What’s the difference between an iOS App and an Android App?
There are several differences between an iOS app and an Android app which start in the development process, where the two apps require different coding languages and development environments. It extends through the launch phase, where the app goes up in the applicable app store, and the user phase. However, these differences won’t stop you from designing one app that works for both platforms.