When Apple started using the phrase, “There’s an app for that” in TV ads in 2009, it encapsulated the multitudinous level of apps for virtually all facets of life. Nearly 15 years later, this phrase remains increasingly relevant. Mobile apps continue to dominate the main stage for one main reason: they make life easier for the user.
However, “ease” isn’t a term that can be used to define the traditional process of building Android smartphone mobile apps. In general, there are two ways to develop an Android application:
- Hard coding in tools like Android Studio
- No-code platforms like Shoutem
Let’s explore both Android application development options to learn the ins and outs of each.
How to Use Android Studio to Create Your First Android App
Android Studio is a robust tool used to develop apps for Android devices. The Android Studio application development tool is the official Integrated Development Environment (IDE) for Android app development. While it’s suitable for experienced Android application developers, the backend can be intimidating, causing novices to struggle through some of the more complex coding sequences. If this is the route you choose, it would help to first research and become familliar with the following:
- Core coding principles
- Java programming language
- Kotlin
- Software development kits (SDKs)
- Application Programming Interfaces (APIs)
Step 1: Install Android Studio
Some projects are difficult to start, but in Android app development, the first step is easiest: Download and install Android Studio on your computer.
Step 2: Create a New Project in Android Studio
When creating an Android app in Android Studio, start with an Empty Activity project template in the development environment. Once you open Android Studio, follow these instructions to start an Empty Project:
- Click New Project: A window will present a list of available Android application development templates. A project template serves as the blueprint for specific types of Android apps. Templates come with the framework, structure, and files required for Android Studio to build your project. By choosing a template, you’ll receive a starter code to get you moving toward completing your Android application faster.
- Ensure the Phone and Tablet tab is selected.
- Select the Empty Activity template to develop a simple project you can use to build a Compose app. It features one screen and displays “Hello World”.
- Once you click Next, the New Project dialog will open, and you can configure your project. A few configuration tips are:
- Use the Name field to name your Android application project name.
- The Package name field explains the organization of files.
- The Save location field directs where files are saved. Make sure you recognize the path.
- Once you have optimized your project settings, click Finish. The Android development tool will then set up the app. You’ll notice a progress bar and message to keep you informed.
Step 3: Edit Your Welcome Message in the Main Activity
Editing your welcome message is pretty straightforward. If the activity_main.xml tab isn’t already open, navigate to it. Make sure the Design tab is open on the activity_main.xml display.
- Click and drag the “Hello, world!” message from the upper left corner to the middle of the screen.
- Open the values folder in the project file system.
- Double-click the strings.xml file in the Values folder to locate the welcome message.
- Modify the welcome message to your liking and navigate to the activity_main.xml tab.
- Now, your new message should be centered.
Now that you’ve edited your main message, it’s time to add a button to the main activity. Navigate to the Design tab of the activity_main.xml display and then:
- Find the Button (under the Widgets heading) in the Palette menu.
- Then click and drag the Button to center it under your welcome message. Ensure it remains selected.
- Scroll down to find the field for “text” in the Properties menu. The Properties menu is on the right side of the window.
- Finally, change the button text from “New Button” to the desirable action.
Step 4: Add Activities and Actions
Unless you want a proverbial “one-trick pony”, your app will perform many activities and actions. Here’s how to add a second and subsequent activities to your Android application:
- Click on “app” at the top of the project file’s system tree.
- Navigate to New > Activity > Blank Activity.
- Change the name of the activity to whatever you like and click Finish.
- Ensure you’re operating in the Design view of activity_second.xml.
- Move the text box in the upper left of the display to the middle of the screen—just as you did in the Main Activity.
- Make sure the text box is still selected. Then, locate the “id” field in the Properties menu and set it to “text2”.
- Reopen the strings.xml.
- Create a second line under the original welcome message that aligns with this activity.
- Go back to activity_second.xml. Reselect the text box.
- Choose the “text” field down to “@string/second_page” from the properties menu.
- Ensure your text box reads the desired message and is centered.
Step 5: Change the Background Color
Once you have a few foundational elements, you can step back and marvel at app you’ve created.
Oof. A little boring right now, isn’t it?
Fortunately, there are many customizations you can make to transform the look and functionality of your mobile app. Let’s look at how to change the background color.
- Surround the text with a Surface container, which represents the section of UI where you can change the appearance of your Android application. To do this, highlight the text and press either:
- Alt+Enter on Windows, or Option+Enter on Mac.
- Then choose the Surround with widget option.
- Select Surround with Container. It should default to a Box, but you can choose another type of container.
- To change the background, delete Box and type Surface() instead.
- Add a color parameter to the Surface container and set it to Color.
- When you type Color, Android Studio may make it red, which means it’s unable to resolve it. To resolve this problem, scroll to the top of the file to import and choose the three buttons.
- Then add the following statement to the bottom of the list of imports:
- import androidx.compose.ui.graphics.Color
- It’s best to keep your imports alphabetically organized and delete unused imports. Choose Help on the toolbar at the top. Then, type optimize imports, and choose Optimize Imports.
- You will notice the color you included in the Surface parenthesis has changed from red to underlined in red. To remedy this, add a period after it. Then a popup will appear to offer you different color options.
- Choose a surface color.
Take some time in the backend and play around with different colors and options.
Step 5: Test Your Code and Publish Your App
You are ready to test the application by clicking the green play symbol from the toolbar at the top of the Android Studio window. Next, the “Choose Device” dialog will appear. Click on “Launch emulator”, and OK. While this may take a while, the emulator should open and automatically launch the app when the virtual phone is unlocked. Ensure all text is displayed and the button performs the desired action.
After reviewing and testing your code, and perhaps doing significantly more work to build out the features on your app, you can publish it to Google Play Store. You need a Google Developer Account to do this. If your app offers in-app purchases, you’ll also need a Google Merchant account. Once those accounts are created, you’ll upload the app bundles or APK to the system and complete several additional steps within the Google Play Store app publishing process. As this process is somewhat involved, it may be useful to find a step-by-step tutorial on Youtube to help guide you through the process.
How to Create a No-Code Android App with Shoutem
One of the best things about using a no-code app builder is that it doesn’t require any knowledge in backend coding, java script, Kotlin, or any other coding languages. Shoutem’s easy-to-use mobile app development platform enables anyone to create breathtakingly gorgeous Android apps and iOS apps without writing or editing a single line of code. (Related: Check out our article on “How to create an app without coding.”)
Check out how easy Shoutem makes the app design and development process:
Step 1: Pick Your Favorite Template
If you’ve ever used Microsoft Powerpoint, Google Presentation, Prezi, or other click-and-drag tools, you’re ready to use the Shoutem no-code app-building tool. The first step is to choose your template from a generous selection of preloaded options. Shoutem templates include screens, content, and functionalities that are ready to go, and can be published as Android and/or iOS apps.
Pre-built Shoutem templates include:
- News and radio apps
- Travel and tourism apps
- Event apps
- Social networking apps
- Podcast apps
- Church apps
- eCommerce and Product apps
- And more
If you don’t find the template you need, you can start from scratch with a Blank template. Or you can reach out to our pro app developers for assistance. We’ve got you and your app covered.
Step 2: Add Pre-Built App Features
In this step, you can quickly elevate the profile and functionality of your mobile app with easy-to-use, modern pre-built features. If you decide to start with a template, it will automatically populate your app with the most popular features. Meanwhile, if you start from scratch with a Blank template, you can hand-pick your favorite app features, including:
- Content collections (News stories, recent articles, etc.)
- Calendar functions
- Image and video galleries
- Profile displays
- eCommerce highlights (Today’s deals, featured products, etc.)
- Social media posts/links
- Notification status
- Users’ loyalty status
- And more
You can always delete, add more, and edit all the features you add to your app, so feel free to test each one out and pick the best ones for your users.
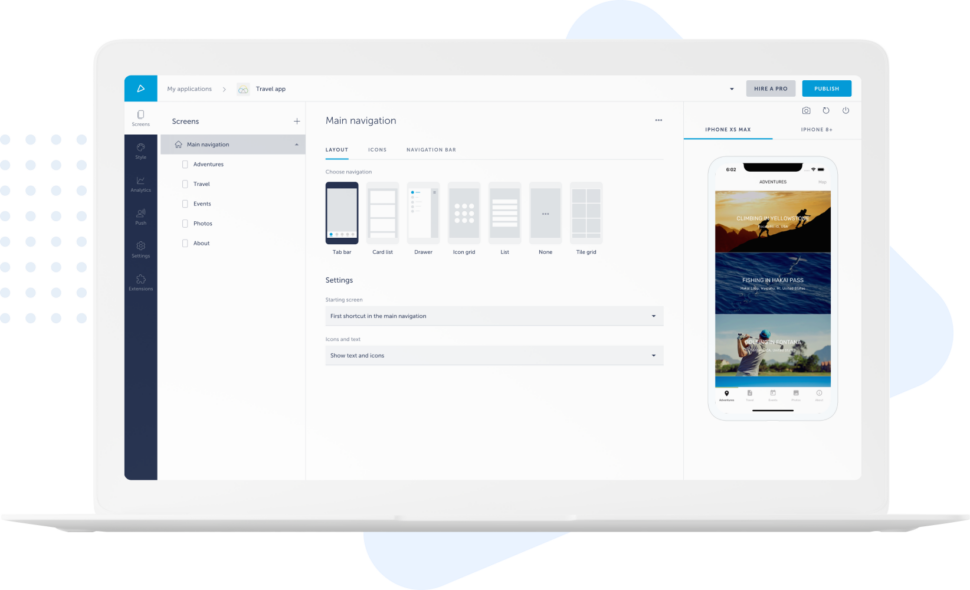
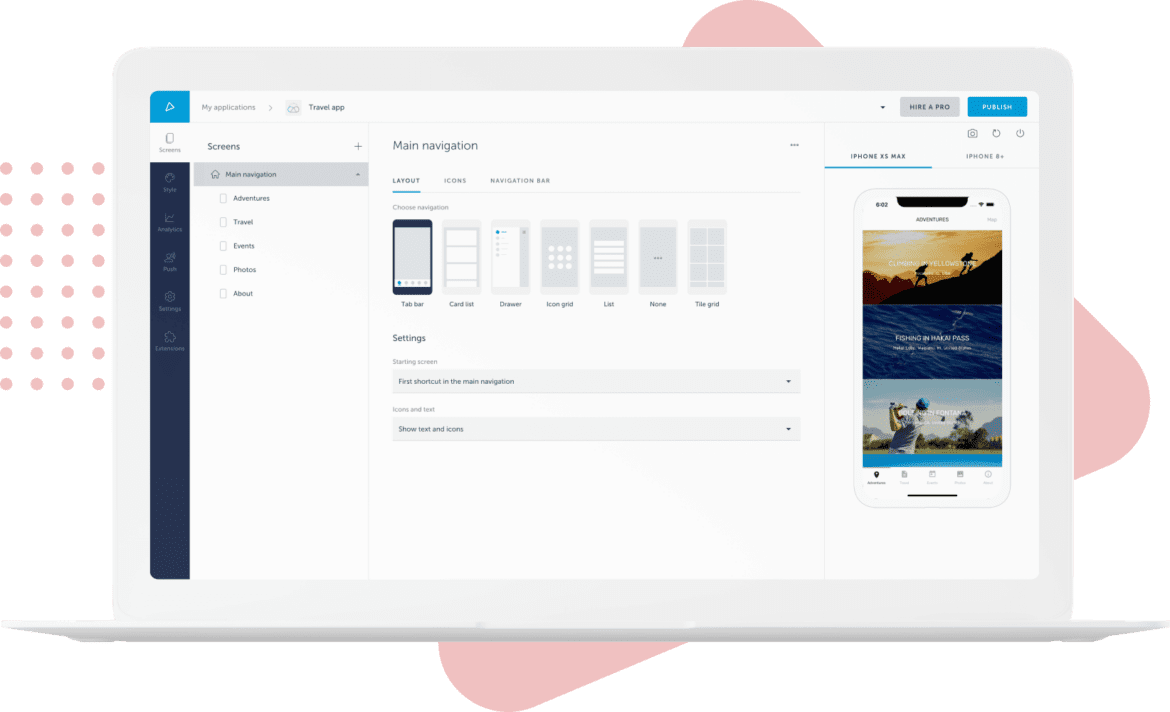
Step 3: Personalize App Content for the Best User Experience
Now, it’s time to make your mobile app your own by personalizing the user interface. In the Shoutem mobile app builder, you’ll find preloaded content and screens based on your template. For instance, if you selected the News app, it will load fully drafted news articles with related imagery and links right from the start. Of course, these articles are just placeholders, and you should modify this content to reflect your own brand and its related information.
One area you will certainly change is the name of your Android or iOS mobile app. Click on the current app name and type your preferred one in the field. Then, click outside the field to save your changes: it’s that easy. You can replace other generic text, images, links, and content repopulated in the pre-built app features in the same manner. Learn more about adding content to your Shoutem app!
Step 4: Preview Your App & Publish
When using Shoutem, you can preview your Android mobile app any time with the integrated preview tool. It’s located on the right side of the website’s user interface. Click the play button to see a live preview—formatted in a mobile device view—of your mobile app with its current content and navigation. Make changes as needed, then preview again. Once you’re satisfied with the look, feel, and performance, you’re ready to publish!
This is one of the best parts of using Shoutem to build your app. Instead of having to deal with the publishing process yourself, the Shoutem team actually does it for you.
Just add your app icons, screenshots, and metadata, as well as your iOS App Store publisher account/Google Play Android Developer account details, then click “Publish” in the top-right corner of your Shoutem builder. Our team will begin working with you to review your app and submit your Android project to be published and ready for user downloads. No sweat!
Want a more in-depth review of preparing an app to be published? Check out our tutorial on How to Publish Your App.
Unlock Benefits of No-Code Mobile App Maker
If you’re looking to create a mobile app for your business or capitalize on the growing need for mobile apps, you have two basic choices:
- Hard code your mobile app in Android Studio, or
- Make it easy — use Shoutem’s no-code Android app development tool.
Even if you had the time to learn to code and research different strings of command, Shoutem is still the faster and more modern way to build the mobile app you need. When you use Shoutem to make your own app, you’ll enjoy:
- Ability to Create both Android and iOS Apps
- Drag-and-Drop Builder
- App Analytics
- Live Testing and Previewing
- Full Branding Availability
- Numerous App Integrations
- Import and Export Content, such as Screenshots
- And more
Best of all, you can try a limited-time offer for a 14-day trial of the Shoutem app maker! Sign up today to start building your Android app.